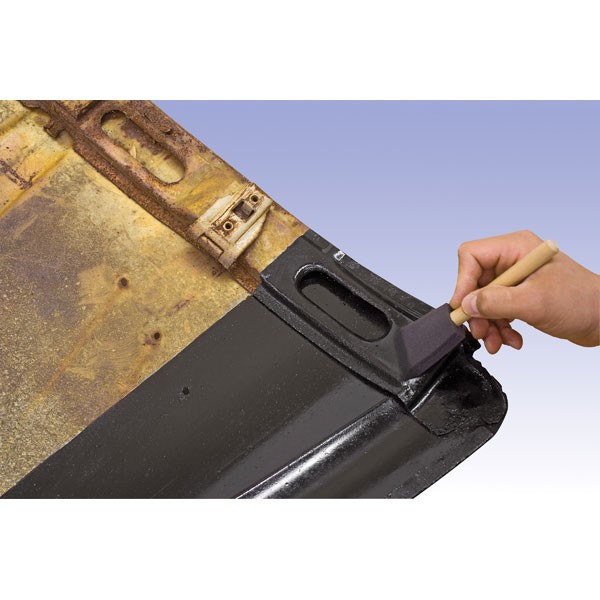
Metal Prep: Pre and Post Epoxy Primr
I emailed Eastwood about the use of their epoxy primer. Here’s their reply:
Good Morning Jim,
Your current project would be a perfect candidate for spraying Epoxy on and doing the body work at your convenience.
You could use http://www.eastwood.com/flap-
I would recommend sanding all the bare metal with 180 grit to get it ready for the Epoxy. Then wait at least 2-3 days before you start your body work for the primer to dry enough. When the time comes to apply body filler I would recommend sanding the surface with 180 grit sand paper. Then once you are done with the vehicle you can scuff the entire surface with a red scuff pad to get ready to move on to a high build primer. I hope this helps. Feel free to email anytime. [After repairs, re-spaying the epoxy would be] a perfect way to make sure that if you have hit any bare metal while doing the body work that you will have the panels protected.
SCOTT CHURCH
Lead Tech Advisor
The Eastwood Company
263 Shoemaker Road
Pottstown, PA 19464
Extension 5409
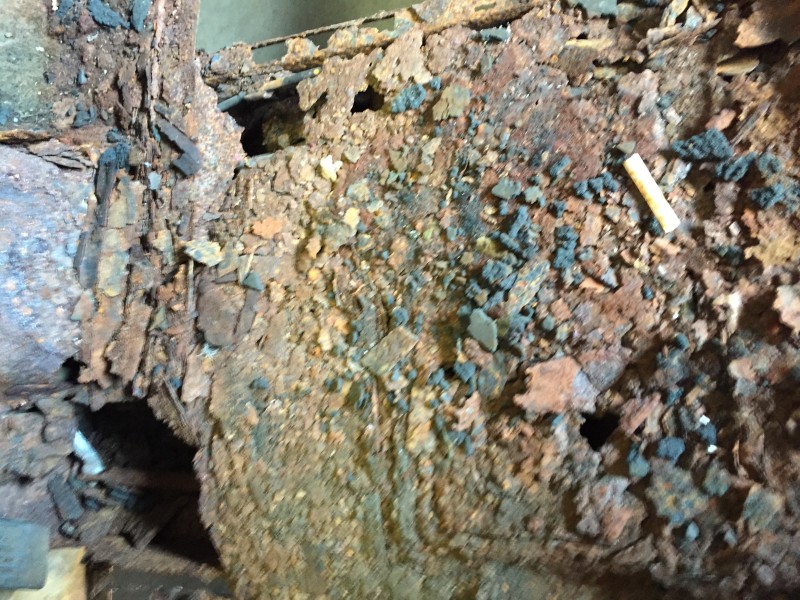
When to Use Rust Encapsulator VS. Rust Converter
Our tech team answers a lot of technical calls and emails each day and there are a lot of common questions asked and advice given. Many of them are about when and where to use our different coatings and paints. Rust products might be the most confusing as far as when to use them and which one is correct for your rust situation. I decided to put together this quick article to help you decide when you should use Rust Encapsulator vs. Rust Converter.
Rust Encapsulator is one of our oldest and most well known products we sell. We’ve been an innovator in rust treatments and this product has stood the test of time. Encapsulator is probably the safest and most universal of our rust products as it doesn’t much care what it is applied over. Below are some examples of situations where Rust Encapsulator is ideal and where another product may be better.
Ideal Encapsulator Uses
1. Surface Rust- Encapsulator will easily go over areas of surface rust and stop the rust from spreading. One medium coat is usually covers light surface rust.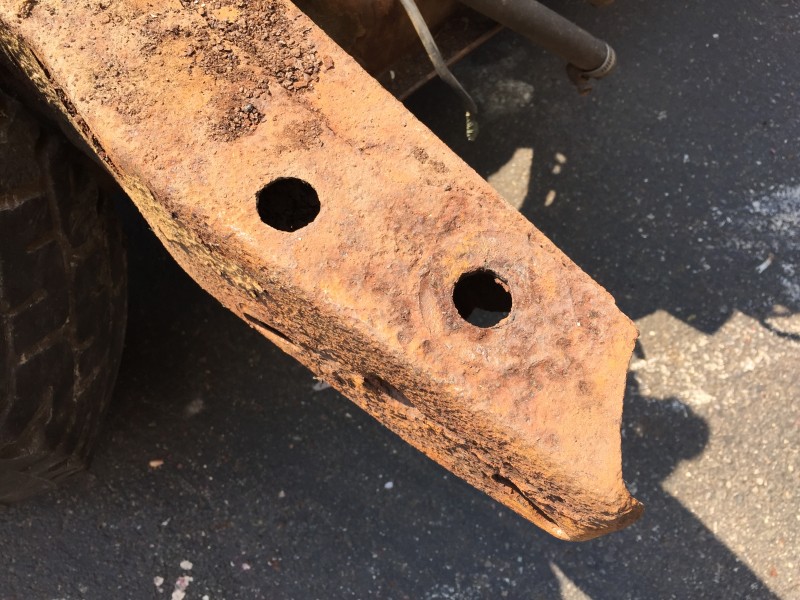
2. Medium Rust- This is rust that is more than just surface or flash rust, it may have started to lightly pit the metal, but hasn’t started to affect the rigidity of the metal. Start by wire wheeling or mechanically removing any loose rust and apply 2-3 medium coats to get complete penetration into the rust.
3. Bare Metal- Rust Encapsulator can be used over bare metal, but I wouldn’t suggest it over an epoxy or etch primer if you ONLY have bare metal to deal with. It can be used to quickly seal bare metal in a pinch to avoid flash rusting as well.
4. Mixed Surfaces- Rust Encapsulator is the best rust product to apply over surfaces that might vary in grades of rust, have bare metal or old paint present. If you have an area that you cleaned to bare metal or repaired and there’s still rust around that area, I’d suggest Rust Encapsulator.
Poor Uses
While Rust Encapsulator can be applied to almost any surface, it isn’t always the best option. Below are instances where we’d suggest a different product for the best results.
1. Over rubberized undercoating or heavy duty anti-rust– Undercoating and Anti-Rust are great products for undercarriage, or hidden areas on a vehicle but using Rust Encapsulator over them is unnecessary and isn’t using the product to it’s full potential. I absolutely prefer to use it as a base under rubberized undercoating for piece of mind.
2. In hidden, boxed, or hard to reach areas- Rust Encapsulator needs some basic prep before application (wire brush loose rust and degrease with PRE). It also needs complete coverage to properly stop the rust and it can be tough to get it to cover properly on an area that hasn’t been prepared completely. For hidden, boxed, and hard to reach areas we suggest our Internal Frame Coating.
Rust Converter is a coating that will convert heavy rusted areas into a protective polymeric coating with little prep. This product works well when used as directed, but doesn’t have room for error when it comes to using it on the incorrect surfaces. Rust Converter NEEDS 100% rust present in order for it to work correctly and to fully cure. The surface does need to be top coated after cured. For the best protection we suggest to apply Rust Encapsulator over the Converter and then top coat.
Ideal Uses
-Medium Rust- Areas that are completely covered in substantial rust are ok to use Rust Converter on as long as it isn’t mixed with bare metal or other coatings around it.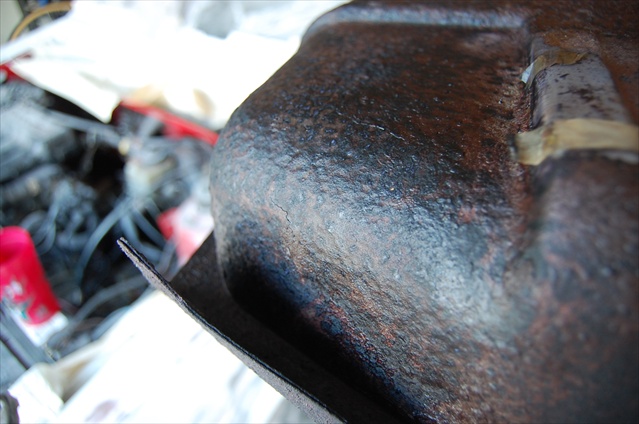
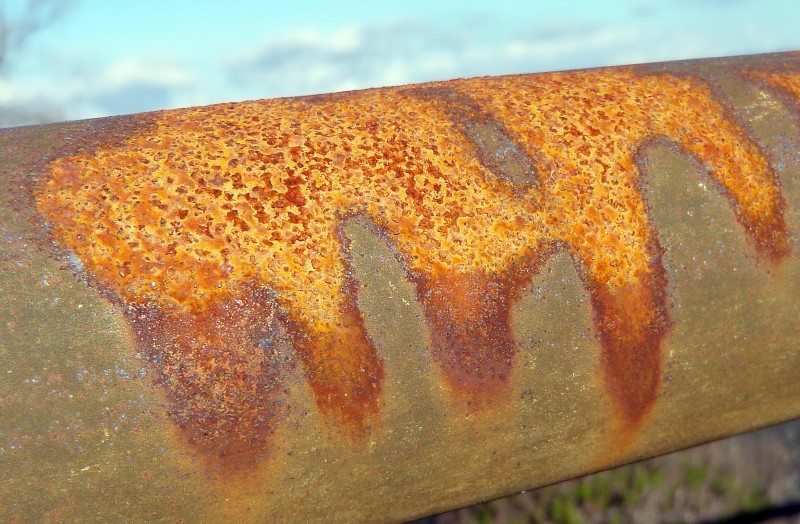
-Heavy, Flaky Rust- Rust Converter works best on rust that is HEAVY. This would be scaly rust that has begun pitting the surface and has covered all of the metal. We still suggest to knock off (wire brush/wheel) the loose, flaking rust before applying the product. The goal is for the entire surface that is rust to turn a purplish-black once the converter has finished curing. It may take 2-4 coats to fully convert a surface.
Poor Uses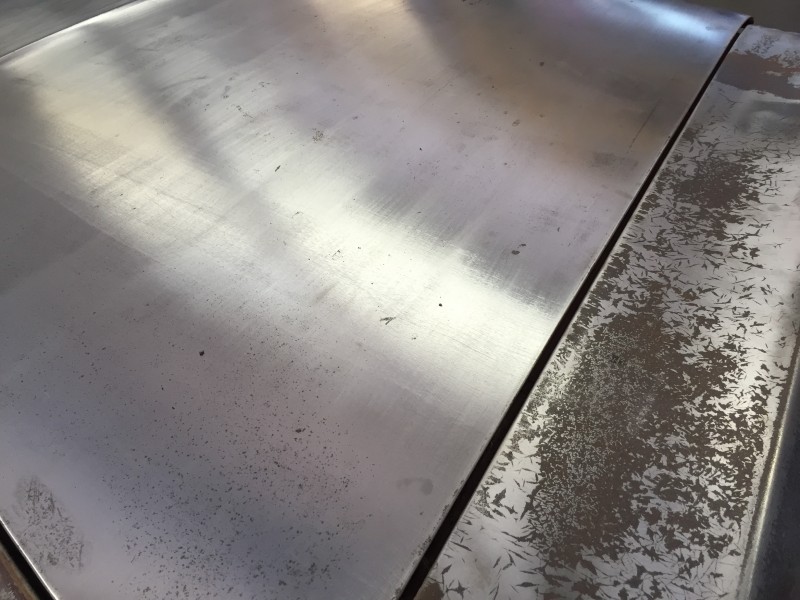
-Bare Metal- DO NOT EVER apply Rust Converter over bare metal. This product needs 100% rust present for it to work. In fact virgin, clean metal could actually flash rust if Rust Converter is applied and left on it.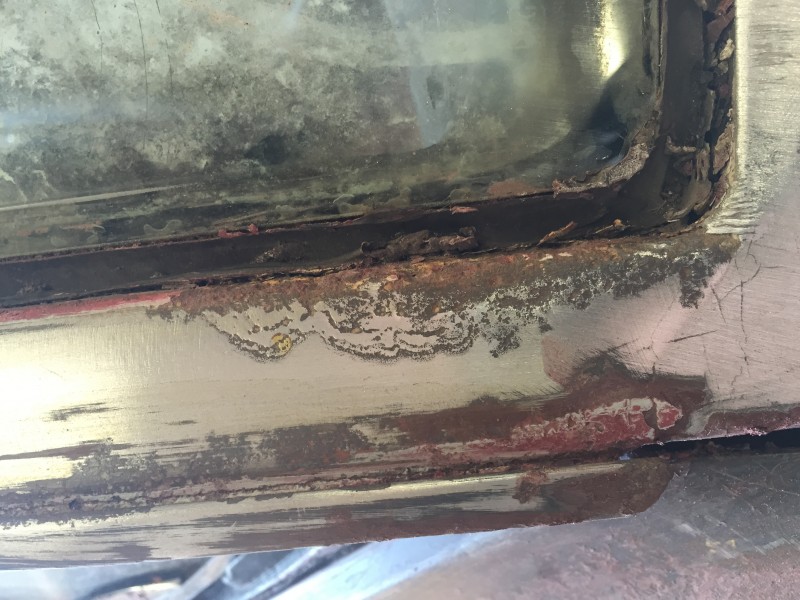
-Mixed Surfaces- Rust Converter needs 100% rust present in order for it to fully cure. This means it won’t work completely on areas that are a mix of rust and bare metal, or a mix of original paint and rust. If you’re trying to treat small rust spots that have paint surrounding them (that we assume you don’t want to damage) you can use Fast Etch to saturate the area and get into those small rust spots. Then touch up with paint as needed.
-Painted or coated surfaces- This product won’t work on bare metal areas to protect or prevent from rust. If applied to areas that are painted or used to coat for prevention the Rust Converter won’t fully cure and the surface will stay sticky.
If you follow these quick guidelines you can quickly determine if you need Rust Encapsulator or Rust Converter. Feel free to drop us a comment if you’d like to see a buyers guide for any other product.
-Matt/EW
How to Make Custom Interiors
Gasoline, Timing & Twin-ignition
This article concerns mainly for air-cooled cars, however many principles apply to the water-cooled engines as well. These subjects are all inter-related in the optimization of performance.
Fuel
Timing and Detonation
Twin-ignition
Fuel
Fuel quality problems in the USA have been present since the EPA mandated the removal of lead in gasoline and addition of oxygenates to comply with Federal and local emissions regulations. Maintaining seasonal drivability while affording a margin of resistance to detonation has resulted in motor fuels that have some unpleasant characteristics. In addition, the compression ratios in Porsche cars have gradually crept upward since 1982 in the effort to improve performance, fuel economy and overall efficiency.
The air-cooled, twin-plug Porsche racing engines and 3.6 litre street engines equipped with modern engine management with knock-sensing ignitions haven’t suffered quite as much from the latest gasoline formulations and the later 4-valve, water-cooled heads used in the 996, 997 and Boxster/Cayman cars are much more tolerant of differing fuels due to strict control of cylinder head temperatures as well as optimal spark plug location.
Performance issues that affect all cars including Porsche naturally aspirated as well as turbocharged models are the constant variations in the chemical makeup of motor fuels and the seasonal changes made by the oil companies to comply with Federal Clean Air Act regulations. Not all areas of the USA mandate the use of oxygenated or reformulated gasolines, however there are changes in the fuel composition due to seasonal temperature changes. The net effect is the change in power and drivability that most Porsche owners regard as normal or perhaps the need for a tune-up. Throttle response, acceleration, knock resistance, and overall power are affected by these changes in gasoline.
Racing gasolines have now been widely accepted as one good solution for maintaining peak performance in Porsches used for DE events and competition. Besides the obvious octane issues, the main reason why most racers use racing gasoline is to eliminate the variables in specific gravity, vapor pressure and octane present in today’s pump fuel. Racing fuel formulations and offerings do vary among the different manufacturers as well for different applications. Each gasoline formula performs differently in Porsche cars and one should try several brands within a similar octane group to determine which one offers the best throttle response and power. There is a big difference!
Pump gasoline octane rating numbers posted at the gas pumps do not tell you very much about what to expect using that fuel. That yellow sticker is the average of the Research Octane Number and the Motor Octane Number of that particular fuel. The RON of a fuel affects low to medium speed knock and engine run-on. This number is typically 8-10 numbers higher than the MON. The Motor Octane Number is determined under higher RPM and high loads. This affects the high speed and part throttle knock characteristics and this is of greater importance to owners of high-performance cars.
If the MON is too low, you could experience detonation during passing maneuvers and when climbing hills under load. If the RON value is too low, then you might experience part-throttle detonation.It is VERY important to realize that some engines respond better to a higher RON and others will perform better with a higher MON depending upon combustion chamber shape, compression ratio and spark plug position. Since RON and MON values & ratios are proprietary to each manufacturer of gasoline, you must try different fuel to see which one performs best in your car. Load dyno testing will also help determine what fuel to use.
These variations in RON and MON will not change the posted average octane rating at the pump but we do recommend blending unleaded racing gasoline with pump fuel to raise the average octane ratings to prevent detonation at elevated temperatures. We do recommend this practice when participating in Driver Education or other Track events, especially in warm weather.
Be absolutely certain that the racing gasoline that you may use is UNLEADED. Do not use leaded racing gasoline in any car with a catalytic converter, even for track use as it fouls the oxygen sensors, spark plugs, and cats (if present) .
Other factors that affect drivability in fuel injected and carbureted 911′s are the volatility and inclusion of ingredients that attack the rubber components in the fuel system. Gaskets, O-rings, fuel lines, and float needles are all affected by the compositions of gasoline. Some brands of fuel have been known to dissolve the interior of rubber fuel hoses!. Some of these items will need constant observation and regular replacement to prevent engine problems. This is why its foolish to simply add some Toluene, Aniline, and Zylene to the fuel tank, even though those compounds are proven ingredients in racing fuels. For example, a leaking rubber-tipped float needle in a carbureted 911 can fill a cylinder with fuel causing hydro-lock and result in engine damage as well as a major fire hazard. Unleaded racing gasolines generally do not cause these problems since they are formulated minimize rubber degradation, however this can very among fuel manufacturers.
Now is the time to mention the most common octane-enhancing, oxygenate present in pump gasoline, Ethanol.
Ethanol is an alcohol that has very clean-burning characteristics, however it also absorbs water and its characteristics as a solvent scours out any dirt or impurities present in the fuel system and deposit them downstream into the fuel filter plugging it up very quickly. For that reason, we do recommend regular fuel filter replacement.
While Ethanol’s 116 RON octane is a boon for turbocharged cars, its lower energy content reduces fuel mileage and affects fuel mixtures so some corrections may be necessary. The mixture changes caused by blending Ethanol is somewhat self-compensated by most fuel injection systems, however carbureted cars may require some adjustments or jetting changes to maintain performance.
Today’s unleaded gasolines create major carbon deposits on the valves and fuel injectors so requires regular use of fuel system cleaners to maintain throttle response and power. This is a slow insidious process and sometimes the performance loss isn’t apparent until flat spots, misfires, hard starting and rough iding manifest themselves. Regular use of Chevron’s Techron, LubroMoly’s Jectron and Ventil Sauber products will prevent these problems. In addition, some independent repair facilities employ the MotorVac fuel system cleaning process, can restore full power and drivability in short order.
Here is some quick data about 3 major brands of Unleaded Racing Gasoline that illustrates some differences that you should consider when choosing which fuel to try. Leaded racing fuels are illegal for road use and will contaminate a catalytic convertor. Unless you have a static compression ratio over 12:1, these unleaded racing fuels should work just fine, especially with twin-ignition.
UNOCAL 76 Trick Unleaded Sunoco GT+
SGrty 0.7 0.75 .735
RVP 6.6-7.0 7 9.0
RON 108 104 N/A
MON 95.2 96 N/A
(R+M)/2 100.2 100 104
As you can see, changing the RON and MON combinations may not make a change in overall octane, but their burning characteristics and anti-knock qualities can vary enough to make a significant difference in how your Porsche runs! The Reid Vapor Pressure, or RVP, is an indication of volatility which affects the fuel’s resistance to vapor lock, its ability to start easily when cold, and its throttle response. The fuel’s specific gravity specifications, also affect the float levels in carbureted cars and mixture settings. If the fuels’ RVP is too low, 5.5 or less, this can cause poor throttle response and stumbling when the throttle is suddenly opened. RVP’s that are too high, 8.0 or more, can create vapor lock and fuel percolation in float bowls.
Here is a mixing chart for blending 91 octane unleaded Premium with 100 octane unleaded Racing gasoline
These figures are not exact due to the variations in pump premium but they are very close
Gallons100 oct race gas 1 2 3 4 5 6 7 8 9 10 11
91 oct pump gas
1 95.5 97 97.8 98.2 98.5 98.7 98.9 99 99.1 99.2 99.3
2 94 95.5 96.4 97 97.4 97.8 98 98.2 98.4 98.5 98.6
3 93.3 94.6 95.5 96.1 96.6 97 97.3 97.5 97.8 97.9 98.1
4 92.8 94 94.9 95.5 96 96.4 96.7 97 97.2 97.4 97.6
5 92.5 93.6 94.3 95 95.5 95.9 96.3 96.5 96.8 97 97.2
6 92.3 93.3 94 94.6 5.1 95.5 95.8 96.1 96.4 96.6 98.6
7 92.1 93 93.7 94.3 94.8 95.2 95.5 95.5 95.8 96.1 96.3
8 92 92.8 93.5 94 94.5 94.9 95.2 95.5 95.8 96 96.2
9 91.9 92.6 93.3 93.8 94.2 94.6 94.9 95.2 95.5 95.7 96
10 91.8 92.5 93.1 93.6 94 94.4 94.7 95 95.3 95.5 95.7
11 91.8 92.4 92.9 93.4 93.8 94.2 94.5 94.8 95 95.3 95.5
Timing & Detonation
This is critical issue relating to engine performance and durability especially for air-cooled engines. Since cylinder head operating temperatures mirror ambient temps (as well as load), it assumes a much greater priority in preventing detonation as they are related. Porsche air-cooled engines are not quite as detonation resistant as other types due to their hemispherical combustion chambers and offset plug location.
The early 2.0 litre 911 engines, with their small, deep combustion chambers and high-domed pistons, are much more prone to detonation than the later versions which had flatter, more open chambers. The main problem in the 911 air-cooled engine is the spark plug position. Since the plug is offset to one side, there is a propensity for the piston dome to block the opposite side of the chamber at Top Dead Center. This creates pockets of fuel and air that is shielded from the main flame front created by the spark plug and detonation results from the spontaneous uncontrolled ignition of that pocket of fuel. Over-advanced timing, high compression ratios created by domed pistons and inadequate fuel quality all contribute to detonation. Further, Porsche’s hemispherical air-cooled heads are well known for poor swirl characteristics and the bigger bore engines are quite detonation prone at 9.5:1 and above.
The water-cooled 4-valve heads used in the 996/997, Twin-Turbo/GT-3 and Boxster/Cayman engines have a centrally located spark plug that gives better and more thorough combustion with excellent swirl, without the need for twin-ignition.
Since engines are inherently noisy and air-cooled engines in particular, are somewhat noisy due to fan, valve gear and chain noise as well as having no water jackets to dampen engine sounds, it is very difficult to hear low levels of detonation in these cars. In addition, there exists a phenomenon known assub-audible detonation. This condition can occur in any engine and is very dangerous since it is almost impossible to detect except by careful spark plug inspection, or carefully calibrated knock sensors. The engine can be detonating and you may never hear anything and broken rings are oftentimes found due to this phenomenon without the driver being aware of any additional or unusual noises.
Sub-audible detonation can break ring lands and destroy rings before anything is noticed. This is why one should never attempt setting the timing by ear. The engine’s timing requirement’s and detonation threshold do change with outside air and cylinder head temperature. Since cylinder head temperatures vary with the load on the engine, it may not knock driving on a level road or freeway, however passing or climbing will raise head temperatures, thus octane requirements will increase very quickly.
The factory timing specifications were established on an engine dyno to allow for these wide range of conditions and variations in fuel quality with a margin for safety. Setting the timing at the threshold of detonation with one brand of fuel, will not prevent detonation using another brand.
When the timing is over-advanced, combustion temperatures and cylinder pressures quickly skyrocket to levels (over 220K psi) that can damage engine components very quickly. In the particular case of turbocharged engines, these can go from mild detonation to piston destruction almost instantly, far faster than you can react and take your foot off the throttle pedal. Non-standard boost levels and pump gas can create the conditions that cause detonation. In fact, boost levels over 1.1 bar without racing gasoline and twin-ignition is a recipe for disaster in most CIS-equipped 930’s.
Retarded ignition timing results in excess heat being generated in the cylinder heads that is also detrimental to engine life. Poor throttle response, high oil temperatures and low power are characteristic of retarded ignition timing and in worst cases, the exhaust system may glow red.
Automobile manufacturers use knock sensors, adaptive ignition systems and direct fuel injection to optimize ignition timing and air/fuel mixtures to current engine operating conditions.
Twin-Ignition
Porsche has used twin-ignition in their air-cooled racing engines since the 4-cam Carrera engines. The high-domed pistons necessary for high compression ratios requires another spark plug to start another flame front on the other side of the piston dome. The best place for the spark plug is the middle of the combustion chamber. From the center, the flame front will have the least distance to travel for complete ignition. This reduces the need for as much ignition advance to start and finish the combustion process when the piston reaches Top Dead Center. Since the spark event is starting closer to TDC in the compression cycle, there is less pressure from the beginning of ignition that is pushing ‘back’ down on the piston crown as the combustion event progresses. This lessens the ‘negative’ work done by the expanding gasses and allows all of the pressure building in the cylinder to push the piston in the correct direction, making the engine more efficient.

Single plug combustion pattern
The offset-plug position on a 911 delays the combustion process. By installing two spark plugs per cylinder, you will increase the acceleration of the ignition sequence. This can reduce the required advance by 10 degrees or more thus lowering cylinder head temperatures. In terms of power, twin-ignition will add some 3-4% or more depending upon compression ratio, over a single ignition system. RPM can increase as much as 700 RPM at top speeds. If high compression ratios are to be used, twin-ignition allows all of the power benefit to be gained from the increase. Twin-plug equipped 911 and 930′s run much crisper and cleaner with lower cylinder head temperatures and improved throttle response. Plus, a twin-plug 911 is much less prone to plug fouling with today’s fuel.

Twin plug combustion pattern
Besides the damage to one’s bank account, there isn’t one drawback to installing this system and enjoying the benefits in throttle response, power and great drivability that twin-ignition adds to any 911 or 930. Quite a difference!. In some cases, it is a necessity to realize the maximum gains from a complete set of engine modifications.
The water-cooled engines have a much more optimal spark plug location at the top and center of the combustion chamber that negates the need for two spark plugs per cylinder.
Twin-ignition Hardware
There are 3 basic methods to installing and using dual plugs in these engines:
1) Custom billet Distributor or stock distributor converted to RSR configuration. The first option is a brand new, billet unit utilizing an American-made magnetic trigger & advance mechanism with a Marelli-type cap and custom rotor. These have three ball-bearings to support the shaft and are quite durable. The second option utilizes the OEM distributor to mount a billet adapter ring to accept the Bosch 12-nipple RSR cap and machining the distributor shaft to accept the RSR rotor. The cap and ring must be properly phased to the rotor alignment using a distributor machine and the advance curve should be modified to suit. Point-type units can be converted to breakerless by installing a Pertronix Ignitor. This setup can trigger either the OEM Bosch CD boxes or a pair of MSD 6AL’s with MSD matching coils for best performance. This setup is available for all 2.0 through 3.8 litre engines with carburetors, MFI or EFI systems.
CIS-equipped 930’s should use make sure the distributor retains that all-important vacuum advance/pressure boost retard feature that is critical to engine life and proper throttle response.
2) 964 Dual-distributor converted for 2.4-2.7-3.0-3.2 litre Engines. This one is done by installing a trigger from a donor SC distributor and using the appropriate crank gear, depending upon the engine being used. This unit will not fit a 930 due to interference with the boost plumbing. Again, these can be triggered by OEM Bosch CD boxes, MSD’s or a proprietary splitter unit for Motronic-equipped engines. This setup is ideal for any Motronic motor and works very well in carbureted or MFI-equipped engines. The 3.6 crank gear must be used for these conversions.
3) Crank-triggered Distributorless Ignitions. The ubiquitous Electromotive HPV-1′s and TEC-3 Engine Management systems fall into this category as does the superb but expensive MoTec or DTA ones. These do require additional RFI and EMI shielding to prevent stray ignition signals that create random misfires. We use additional grounding straps and Magnecor wires to eliminate this possibility and maintain the integrity of the ignition signals. These coil-pack ignition systems operate at system bus voltage and are best utilized on EFI-equipped engines that have excellent mixture control. Some of these do not produce the amount of ignition current needed to keep the plugs clean in a rich mixture environment such as what carbureted and MFI-equipped engines operate with.
The other drawback is that you cannot use spark plug gaps larger than .032 without misfires in high-compression or boosted engines. Its well proven and documented that plug gaps in the .040-.050 range make more overall power and result in better idle qualities due to the larger flame kernel and the resulting more thorough combustion process.
4) Coil-on-plug Ignitions. These are mainly used in OEM and aftermarket Engine Management systems to eliminate high-voltage cables and coil saturation time issues by providing each plug with its own coil.
These are not inexpensive pieces of equipment to buy but the performance and drivability gains are impressive and the increased protection from detonation is something to be considered in any high-performance 911 or 930.
There is a wealth of information available on these subjects and we have only scratched the surface here. If you would like more information on these issues or other performance-related Porsche questions, please contact us at 503.244.0990.
Proper Way to Rekey Lock
This is the proper way to rekey a lock, swapping out the wafers.
How to Rekey a VW Key
Well, probably not the REAL way to do it, but it could work.
Top ten most common (or costly) mistakes when restoring a Karmann Ghia
FROM:http://www.karmannghia.com/page.asp?pageid=48
General Areas:
1. Do the body and mechanical first, the interior last.
2. Do not cut out damaged sheet metal BEFORE you receive replacement panels (cutting an inch too much can be miles of heartache). Some Ghia sheet metal is very hard to find.
3. Paint:
a. Disassembly: Remove all exterior rubber seals, bumpers, lights, molding, chrome and glass. If it is your first Ghia; take a few pictures first, then “Bag & Tag” all related parts together. A simple thing like threading nuts/screws back on the parts they came from will save you hours when assembling.
b. Be sure to remove dirt/pealing paint from under the rear deck lid louvers. Ask the painter to pay special attention to this area. Also the area where the body curves under, particularly the nose and rocker panels (under the doors). Both prep and painting.
c. Inspect your Ghia in general just before spraying.
In Particular:
4. When mounting the Door Glass to the Lift Channel inside the Door, NEVER tighten the upper two bolts (that go through the Door Glass) more than ½ turn past snug or BOOM goes the Glass.
5. The rear Hood Seal only goes ½ way around the bottom of the Rear Deck Lid opening. In there design wisdom, the Germans thought this is the way it should be and never changed it throughout production. The mistake here is that people with cut down the front hood seal to fit the back.
6. On 69 and later Ghias, to remove the “D” gas door handle (under the dash on the passenger side) pull the handle out to open the gas door. In this position grab the coiled wire just below the handle with needle-nose pliers. While holding firmly so it does not spin, turn the “D” handle counter clockwise to unscrew it. If you try this without the pliers, a second wire inside the coil will break from the twisting and a new, rather expensive unit will need to be purchased.
7. Take off the Mud Sills (also known as Hinge Pillar Cover Plates). This is the plate at the back of the front wheel wells. There are two bolts you can see inside the wheel well, and on 68 and later models, one stud that sticks through the back corners of the front deck opening. Behind them you will find rust causing gunk 90% of the time. From here the rust will quickly invade your rocker panels, which are the thin but structurally significant body beams that run under the side doors. Replace with new seals and reinstall.
8. Door Check Strap, Pin & Rollers, need to be in good shape (about $15 a door). This assembly built into the upper Hinge keeps them from swinging too far and causing damage to the Door and/or Hinges. If you can lift up on your Door when it is open and feel a little play, at least one Hinge is bad ($40). You may be able to replace just the bottom Hinge as it usually goes first and then takes the top Hinge with it ($40), which then chews up your striker (holds the Door Latch to the car when closed, (another $40) and then breaks the Latch (mechanism inside the door…$50-$125 depending on year). Don’t delay on setting this area right!
9. Removing the 1/4 window chrome molding Use a little WD40 (or something stronger if you are not worried about the paint) and spray it in-between the chrome molding and the body. Pull/push/pry this piece FORWARD. After it moves forward about 1″, it will lift off easily, the only resistance being the old caulking. Door top Scraper Molding on pre 1960 models also slide forward (with the door open) until they reach an open area in their bottom channel. When you get one off, it will be very clear how it all works.
10. Make sure the drain holes in the bottom of your doors are open. A butter knife is a good tool for this if you do not have the door panels off. Water is going to get in your door. If these 3 holes are plugged, the Door will rust and the upholstery panels will warp.
Got any more of your own to add? I would love to hear from you and save someone else a little heartache.
Thanks,
Scott – “The Ghia Guy”
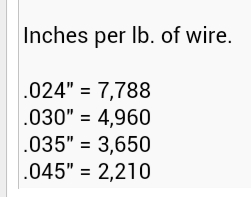
Welding wire lengths per pound
Fyi…
Restoration Budget Estimations
I sat down with the car and tried to make note of everything I want to do as if money where no object. This is what I came up with.
Engine – $4000
Transaxel – $2000
Interior
- Carpet – $200
- Seats – $400
- Dash – $650
- Panels – $150
- Stereo – $400
- Gauges – $400
- Headliner – $100
Rubber Kits – $1100
Wheels & Tires – $1200
Brakes & Suspension – $600
Glass – $300
Paint & Body
- Panels & Supplies – $1000
- Trim – $100
- Mirrors – $150
- Wipers – $100
- Bumpers – $1200
- Grills – $150
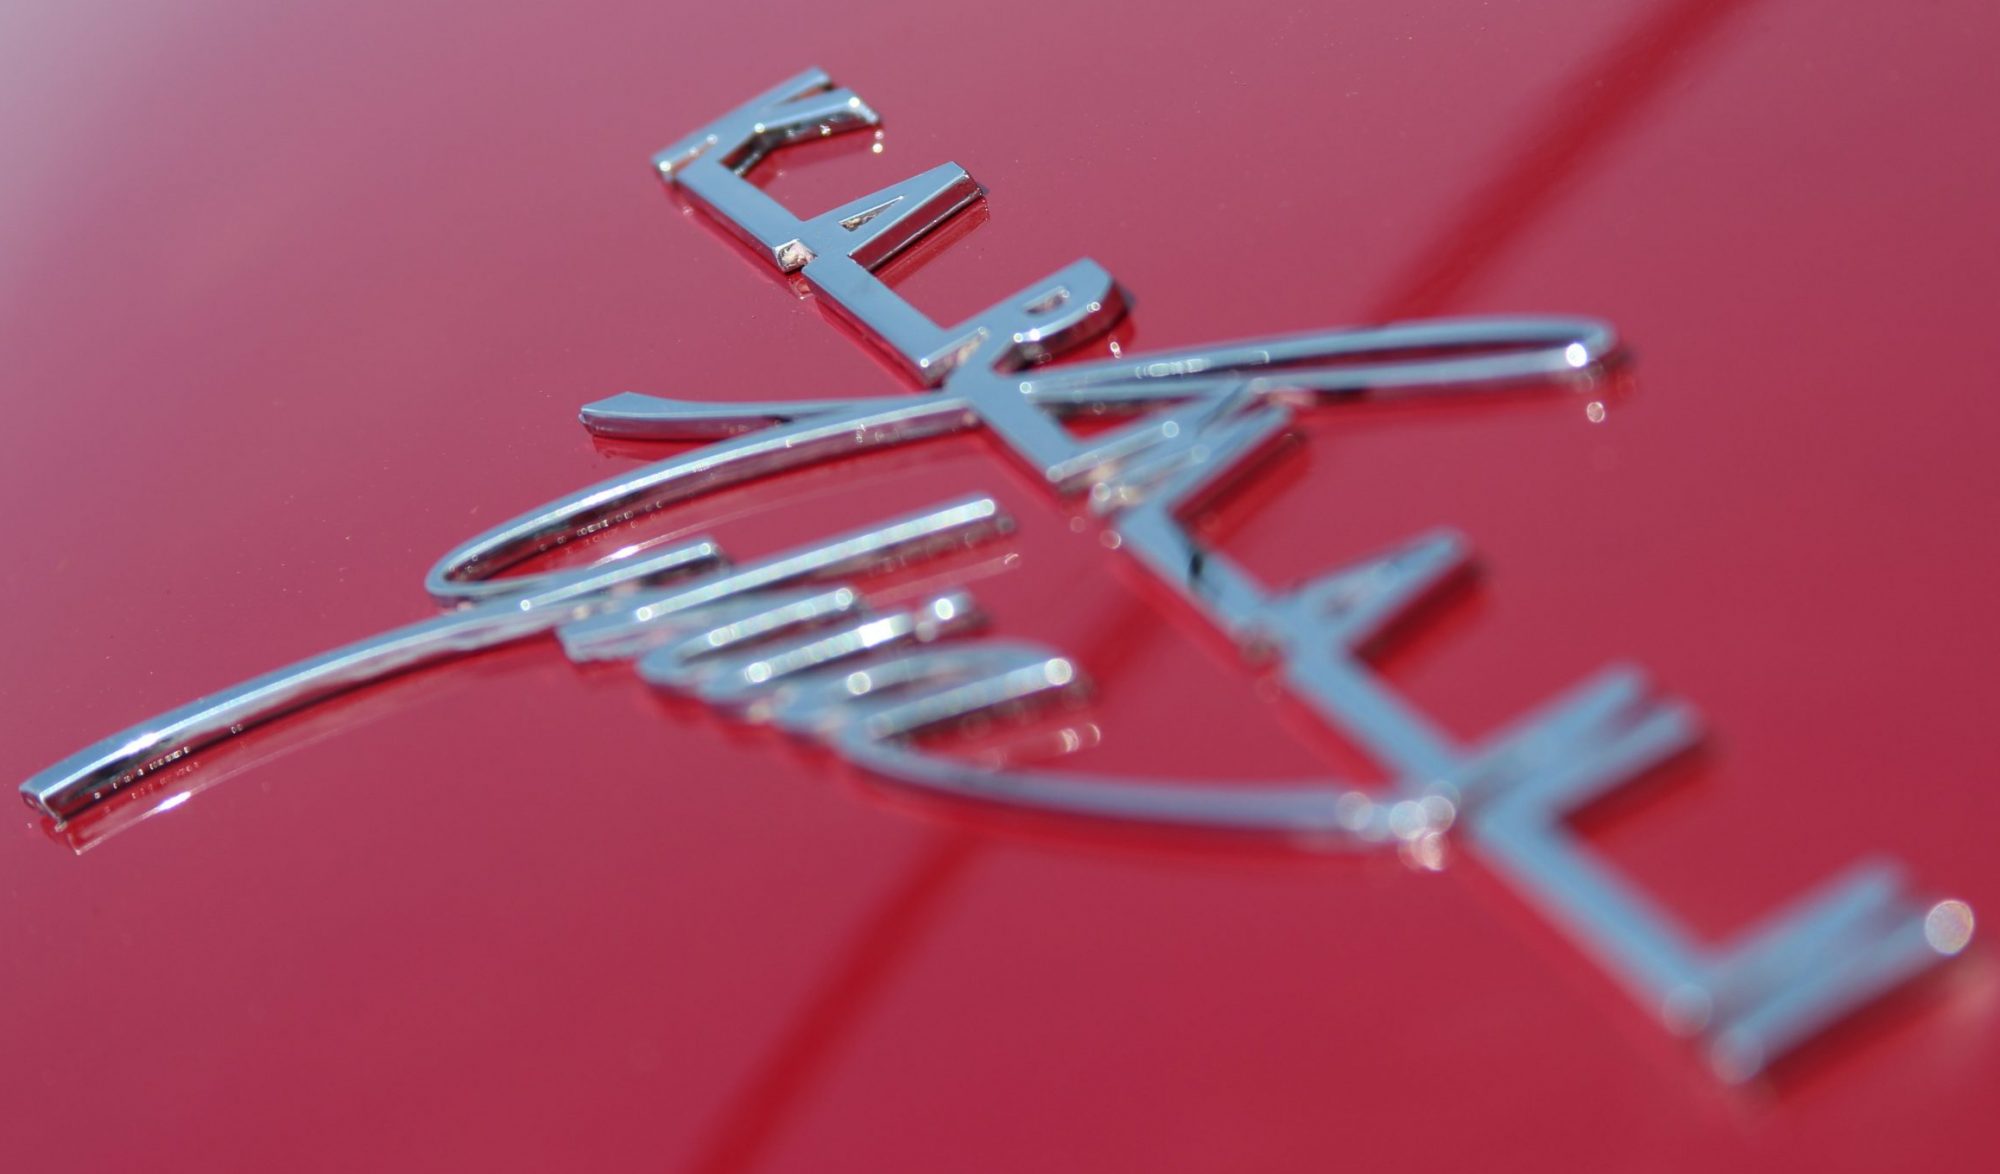
- Badging – $200
Lighting – $400
Fuel – $300
Electrical – $400
Misc – $500
If my math is correct, I’m looking at $16,000. It’s a little more than I though it would been, then again, my original $12,000 estimate was from 2009.