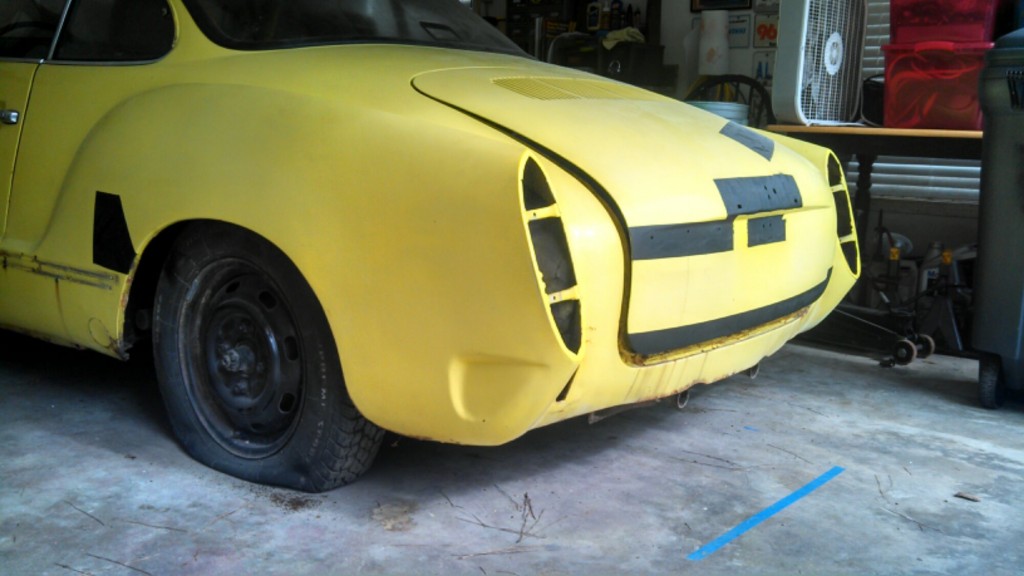
Yeah, I think I should lower the Ghia.

http://www.shoptalkforums.com/viewtopic.php?t=127619
This is a load of great information in this thread on suspension setup and such.
Part ………….ft-lb …….size (dia x pitch)
Engine
Connecting rod nut -24 -m 9×1
Connecting rod capscrew -32 -m 9×1
Crankcase nut -14 -m8
Crankcase nut -25 -m 12×1.5
Cylinder head nut -8 -mm 18 m 8
Cylinder head nut -10- mm 23 m 10
Rockershaft nut -18 -m 8
Heat Exchanger at head -14- m 8
Muffler Clamp bolts -7 -m 6
Intake manifold nut -14 -m 8
Preheat-flange bolt -7 -m 6
Oil Pump nut -14 -m 8
Oil Pump nut -9 -m 6
Oil Drain plug -25- m 14×1.5
Oil Strainer nut -5 -m 6
Oil cooler nut -5 -m 6
Oil filler gland nut- 40
Flywheel Gland nut -235 -m 28×1.5
Clutch bolt -18 -m 8×1.5
Sparkplug -25 m -14×1.25
Engine to trans nut -22 -m 10
Crossmember bolt -18 -m 8
Crossmember bolt -29 -m 10
Generator pulley nut -43 -m 12×1.5
Fan nut -43 -m 12×1.5
Crankshaft pulley nut -32 -m 20×1.5
Crossmember to body -18 -m 8
Fan/Crankshaft pulley -94-108 -m 20×1.5
Front Axle and Steering
Front Beam to pan bolts -36
Body to beam bolts -14
Shock to beam sideplate -14-m 10
Shock to beam sideplate -25- m 12
Shock to lower torsion arm -25
Steering damper to front beam bolt -32
Steering damper to tie rod -18
Tie rod to castle nut -18
Tie rod nut -18
Clamp for tie rod bolt -11
Lock nut for torsion set screw -36
Wheel bearing clamp screw -10
Steering ball joint to knuckle -51
Steering box to front beam -22
Steering coupler to worm shaft -18
Pitman arm to shaft bolt -51
Locknut for pitman arm adj screw -18
Lock nut for worm spindle adj screw -42
Steering box housing cover bolt -18
Canceling ring to steering wheel -3.5
Steering wheel nut -36
Steering column to dash bolts -7
Column switch to attach plate -7
Column switch clamp to housing -7
Steering coupling flange to disc -11
Column to couple flange bolt -11
Manual Transaxle
Drive pinion round nut ball bearing -87
Drive pinion round nut roller bearing -144
Pionion retainer nut -36
Pinion nut -43
Drive shaft nut -43
Reverse lever guide bolt -14
Selector fork bolt -18
Gearshift housing nuts -11
Ring gear bolts – 43
Final drive cover nuts -22
Axle tube retainer nuts -14
Rear wheel bearing retainer nut -43
Oil drain plug -14
Oil filler plug -14
Rear axle shaft nut -217
Transaxle to frame bolt -166
Master cylinder
Stop screw in housing bolt -7
Residual pressure valve to housing -14
Brake light switch -14
Master cylinder to to frame bolts -18
Brake line to master cylinder -18
Front Brakes
Splash sheild to steering knuckle bolts -7
Wheel cylinder to backing plate -18
Caliper housing screw (disc brake) -18
Backing plate bolt -36
Caliper mounting bolts (disc brake) -29
Bleeder valve -9
Clamp nut screws -9
Hose to wheel cylinder/caliper -14
Rear Brakes
Wheel cylinder to backing plate- 22
Bearing housing bolts -43
Brake drum to axle bolt -253
Lug nut 14mm -94
Lug nut 12mm -72
Pedal assembly
Pedal bracket to frame -32
Pedal stop to frame bolts -18
From http://type2.com/bartnik/tech1.htm#engine

This page is an attempt to empower you to fix your own VW and do it correctly. Unfortunately, there are not many mechanics that are familiar with the VW air-cooled engines anymore, and there are some that claim to be VW experts who are really just hacks. Also, since the price of labor to have your car fixed is not affordable to many, it makes good economic sense to learn how to do the work on your Volkswagen yourself.
This page is updated fairly often, and I will try to add as many articles as possible. I’ve been taking pictures of work I’ve done on my van so as soon as they get scanned, this will be like a mini-manual. I’m sure it will be nowhere near complete, but it will cover the more common and basic problems that can be easily fixed by the shadetree mechanic.
The first thing you need if you want to work on your own Volkswagen is a good set of manuals. I highly recommend those listed below.

In addition to those above, if you have a ’75 or later Beetle or Super Beetle, a ’75 or later Bus, or a ’67 and later Type 3, you should have fuel injection (assuming a US-spec model). In that case, a manual you will find very helpful is “How To Understand, Service and Modify Bosch Fuel Injection and Engine Management” by Charles O. Probst. It’s also put out by Robert Bentley Publishers, the same publisher as the official VW repair manuals. It covers all Bosch fuel injection systems, including the D-Jetronic system found on Type 3s and the L-Jetronic system found on Beetles, Super Beetles, and Buses.
Finally, before you begin wrenching, see this informative tool guide.
DISCLAIMER: Unfortunately, in these litigious times, some moron would probably try to sue me for something regarding the information on this page, so here’s the disclaimer. The procedures on this page are presented as guidelines ONLY. They reflect particular jobs that were done by myself or by another author and were written down from memory as a guide to others who might need to do the same procedure. I make no representations as to the accuracy of the information contained here (please remember that I am not a professional mechanic and that free advice is worth every cent). What you do to your car is what YOU do to your car. I take no responsibility for the results of YOUR actions, lack of common sense, or stupidity. The procedures below were written to help VW owners. They should always be used in conjunction with a good set of repair manuals, such as those mentioned above. Have a nice day.
Replacing rear brake shoes and wheel cylinders on a Bus.
Replacing the front brake pads on a Karmann Ghia.
Replacing the rear brake shoes on a Vanagon.
Replacing the parking brake cables on a Vanagon.
Replacing the master cylinder on a Karmann Ghia.
Replacing the clutch master cylinder on a Vanagon.
Replacing the clutch slave cylinder in a Vanagon.
Replacing the clutch in an early Vanagon or late Bus (with Type 4 air-cooled engine).
Removing and replacing the alternator on a ’72-’79 Bus.
Removing and replacing the starter on an air-cooled Volkswagen.
Starter troubleshooting procedure.
Replacing the points and condenser on an air-cooled Volkswagen engine.
Replacing the spark plugs on an air-cooled Volkswagen engine.
Hot-start relay installation instructions.
Ignition timing instructions for air-cooled Volkswagens.
Carburetor removal/replacement on a 1600cc dual port Type 1 engine (Beetle, Karmann Ghia, Thing, Super Beetle).
Engine and transmission removal/installation in an air-cooled, manual transmission Vanagon (1980-1983).
Thermostat replacement/installation on late Buses and early Vanagons with the Type 4 air-cooled engine.
Valve adjustment on a Type 1 engine.
Changing the oil on an air-cooled Volkswagen engine.
Replacing the pushrod tube oil seals on late Buses and early Vanagons with the Type 4 air-cooled engine.
Adjusting the automatic choke on carbureted air-cooled Volkswagen engines.
Adjusting the fan belt on the Type 1 engine.
Replacing the heater cables on an air-cooled Vanagon.
Removing/replacing the front axle beam on a late Bus.
What kind of gas should you be buying?
Removing/installing window glass on an air-cooled Volkswagen.
How to torque the rear axle nut without a torque wrench.
As any Ghia owner knows, there’s not a lot of room under these boogers for wide tires. This sucks, as tiny tires and I don’t get along. I had a chat with some friends from STF. Here’s how that went down.
Cohibra45: I’m running Porsche 2.0 Fuchs (15×5.5 w/40mm offset) with 195/60/15 Goodyears. I might have been able to move up to 205’s.
Rob: I have seen as big as 16X8 on the rear with 225 tires, but I believe that took an incredible amount of measurements, offset calculations, and still a couple of test fittings.
flat_iv: I have 205/45/16 in the front and 205/50/16 in the rear on my ghia with 6 1/2″ wide wheels. Rears no problem. The fronts are a different story. Dropped spindles were added first but that was to low for me. The tires rubbed on the side of the fenders and the inside of the tire rubbed also. For the inside I just adjusted the steering box stops. Then I added heavy duty front torsion bars from Sway-away. That raised the front end approx. 3/4″. Now I don’t have any rubbing at all.
Also, a gentleman named Daniel is running a set of Porsche Cup wheels with 205’s on his Ghia. Check out the mods he had to do to his Ghia.